The first step was to soften some ice cream and put it in a a special silicon tray that came with the kit. It makes the ice cream just the right shape to be wrapped in mochi. We may not have done the best job filling the tray, but it was our first time. We used Dutch chocolate ice cream, just to get an international flavor. French vanilla was our other option!
 |
| This was later, when we were making the mochi, so some are already out |
Mochi is a Japanese rice cake. Sweet rice flour came with the kit. We whisked it together with some sugar from our pantry and the cocoa packet from the kit (which also has a matcha packet for vanilla or green tea ice cream). Then some water is added to turn it into a paste.
 |
| Carefully measuring |
 |
| Whisky business |
The paste is covered loosely in plastic and microwaved to cook the mochi. It becomes stiff like a dense frosting when it is done.
 |
| Wrapped to keep in moisture (or protect the microwave?) |
 |
| Sticky and thick |
The kit also comes with potato starch. After spreading some on our clean, flat counter, we poured the dough out, flipping it several times for a coating that takes away the stickiness. We then rolled it flat and wide with a rolling pin.
 |
| Making the dough useable |
A small circular cutter came with the kit and made little circles in which we would wrap the ice cream. First, we had to refrigerate the dough, separating the circles with plastic wrap.
 |
| Dough ready! |
After thirty minutes of chilling, we took the circles and the mini ice creams out. The dough was a little hard to wrap around the ice cream. Like any filled dough, we had to pinch the end shut, which worked less well as the dough warmed up. Maybe we should have chilled it in the freezer? Or only taken half the dough circles at a time?
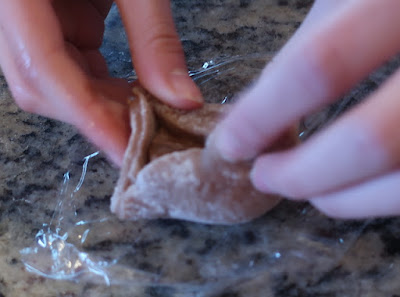 |
| Smothering the ice cream in dough |
 |
| That's a wrap |
The plastic wrap gets wrapped around the mochi ball to help it retain its shape as it goes in the freezer for another ninety minutes.
We planned it so the mochi would be ready right after dinner. It made a good-looking dessert.
 |
| Finished product |
We only found two problems with the process. First, the pinching method did not work too well as one side of the mochi wound up thicker than the other, making it more frozen and a little hard to bite through.
The other problem is the Make the Bread, Buy the Butter issue. That book recommends various recipes that can be made at home and will save money over buying a pre-made product or be healthier. Making a loaf of bread is cheaper and healthier than buying one at the store; making butter is a lot of effort for not a lot of savings in money or benefit health-wise. Putting together the mochi balls was a lot of effort for only eight balls. Each ball is fairly small, making two seem like the right serving size. Depending on the size of your family, that's not a lot of dessert. Making a second batch would take a whole other day, with cleaning the ice cream mold and freezing another set of ice cream balls. It is probably more worth your time to buy the mochi at an Asian supermarket (or maybe your lucky and it's in a regular supermarket by you).
It was a fun experience but I wonder if we will make the second batch with the extra ingredients provided in the kit.


No comments:
Post a Comment